freenas简介
freenas是一个开源、免费的存储系统,能够将一台机器,可以是PC,部署成一台存储设备,可提供NFS/iscsi等协议的访问。功能强大,可用于SAN环境的模拟,以及对性能、稳定性要求不高的存储场景。
在搭建oVirt的测试环境中,我们可以使用FreeNAS来替代商业SAN存储。
下载freenas iso镜像
从官网下载freenas iso镜像
https://www.freenas.org/download-freenas-release/

安装freenas
准备环境
一台物理机freenas.com,或者使用虚拟机,配置CPU4核,内存8G,磁盘两块,一块20G装系统,另一块300G做存储
安装freenas
使用FreeNAS-11.1-U6.iso安装freenas.com 安装完成后重启,系统进入命令行菜单,并会自动获取ip地址
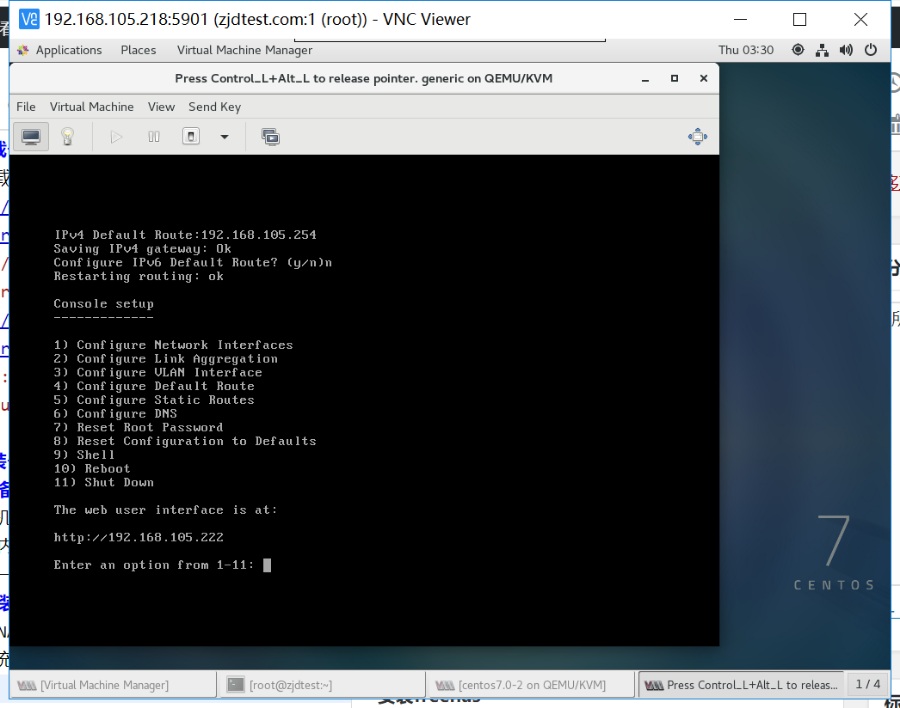
如需修改ip地址,则对菜单第一项中的ipv4地址和第四项的默认路由进行配置,比如我这里将地址改为192.168.105.222/24,将默认路由设置为192.168.105.254
配置ip-san
网络配置完成后使用浏览器访问freenas.com主机的地址进入WEB管理页面,账号为root,密码为安装iso过程中所配置。
第一次登录会弹出配置向导,根据如下步骤配置,将创建出一个ovirt-engine部署所需的iscsi lun。
向导也可以通过点击菜单中的“Wizard”打开。
1、配置语言选中文,时区选亚洲/上海,这里默认用英文也可以,翻译的也不完整

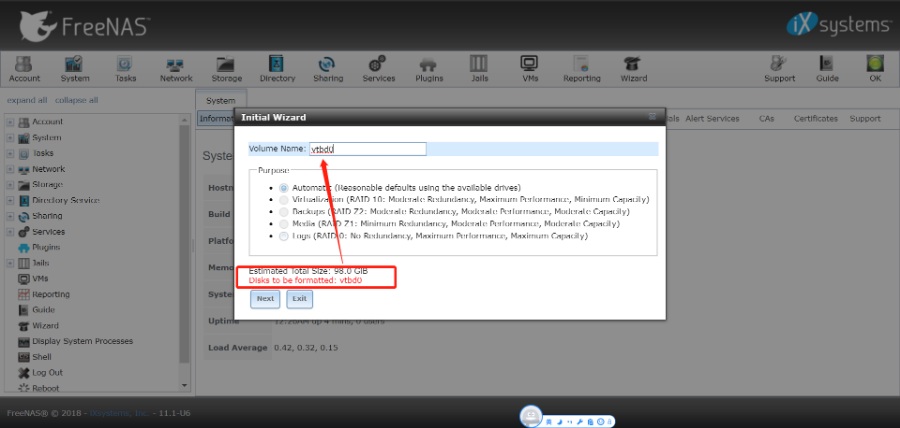
2、配置卷,会列出一个要格式化的磁盘,直接填上这个名称即可
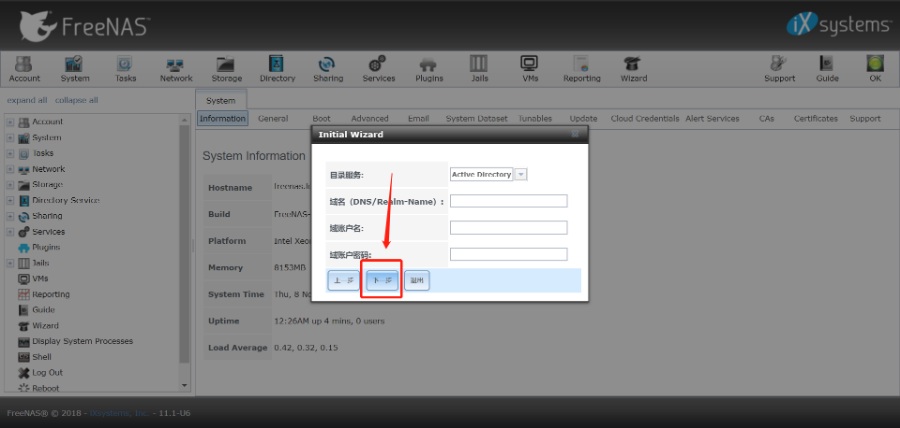
3、配置目录服务,不配,直接过
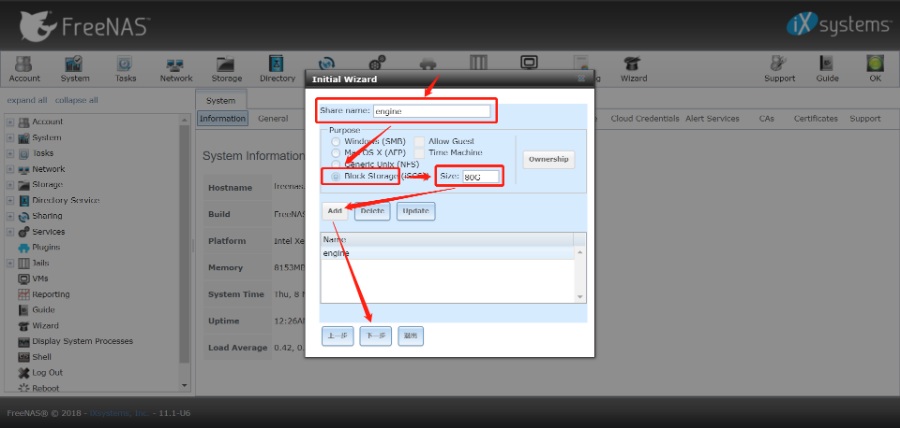
4、配置共享,填名称,选块存储,填大小,engine部署最好80G以上,add下一步
5、配消息通知,不配,直接过
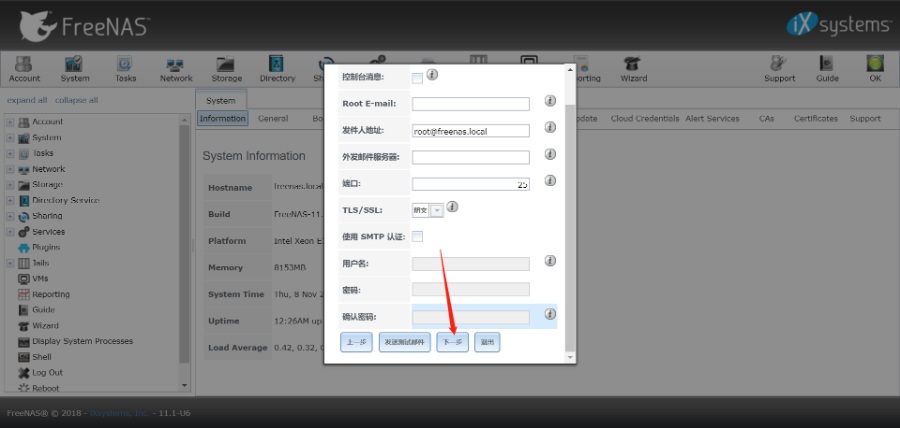
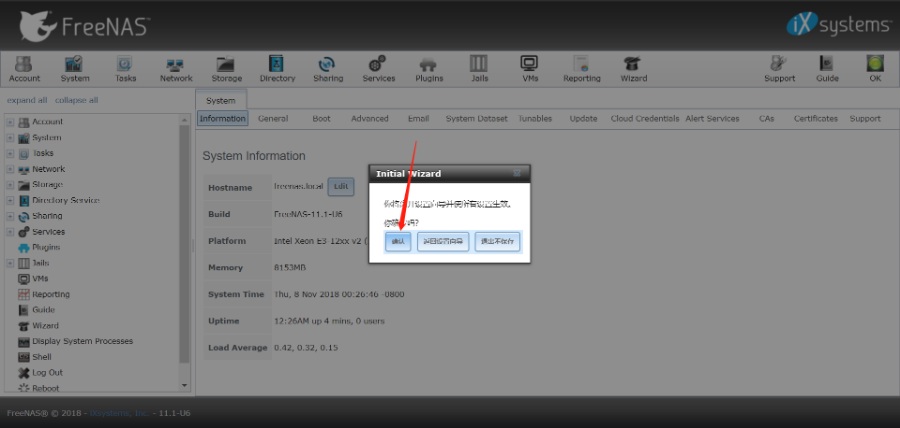
6、直接确定执行自动配置,等待配置完成即可
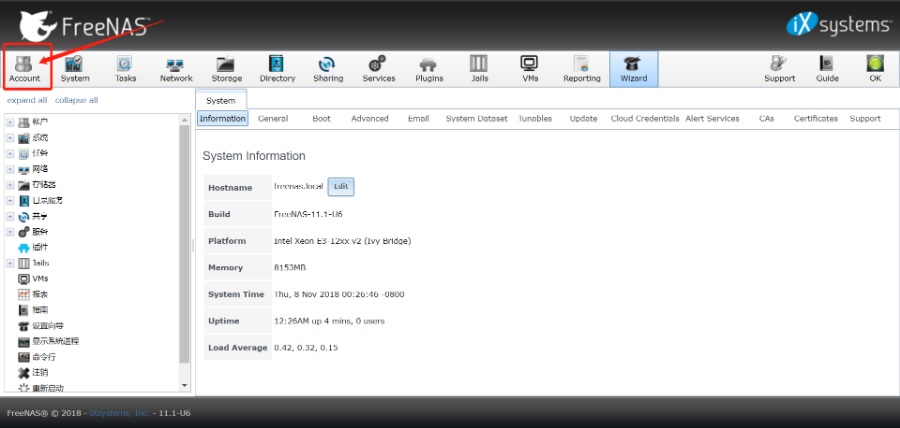
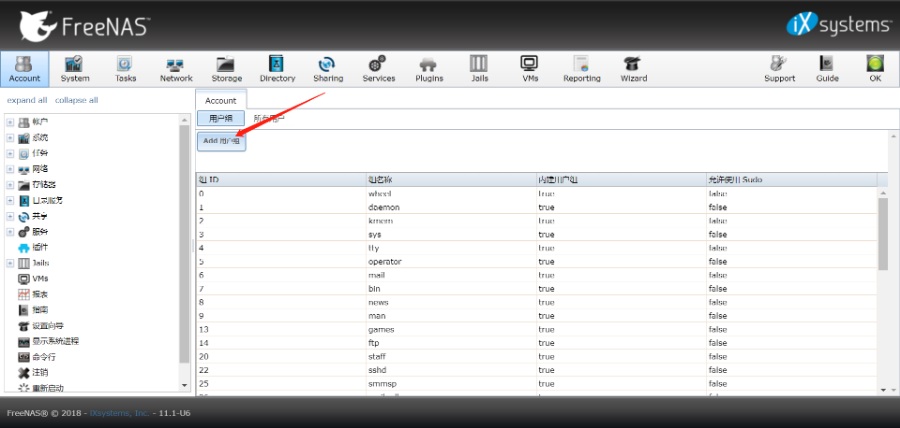
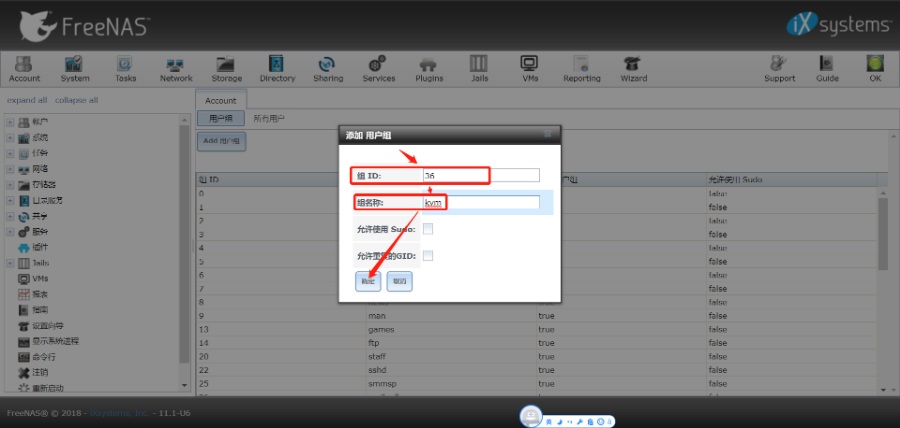
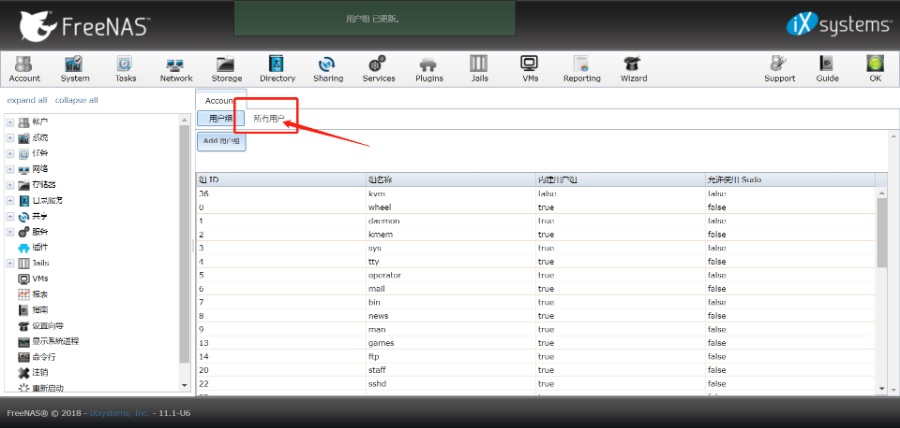
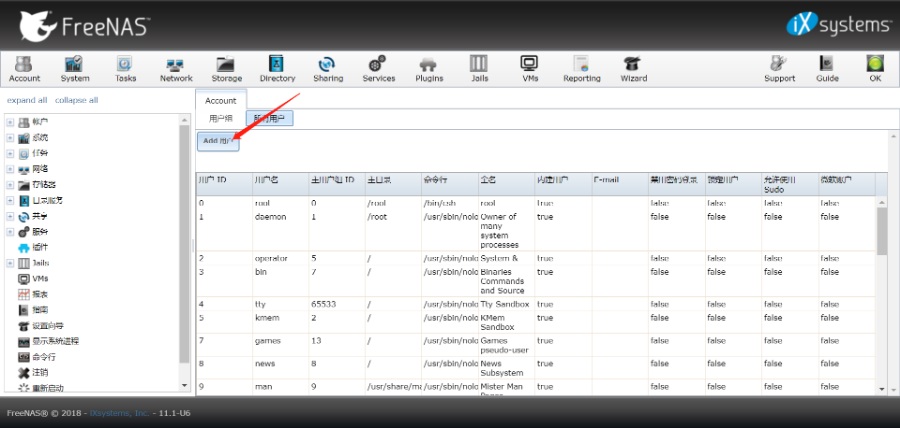
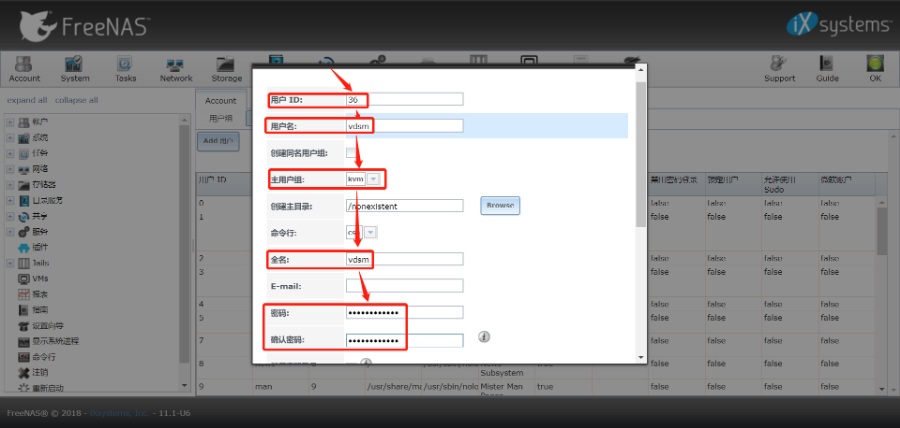
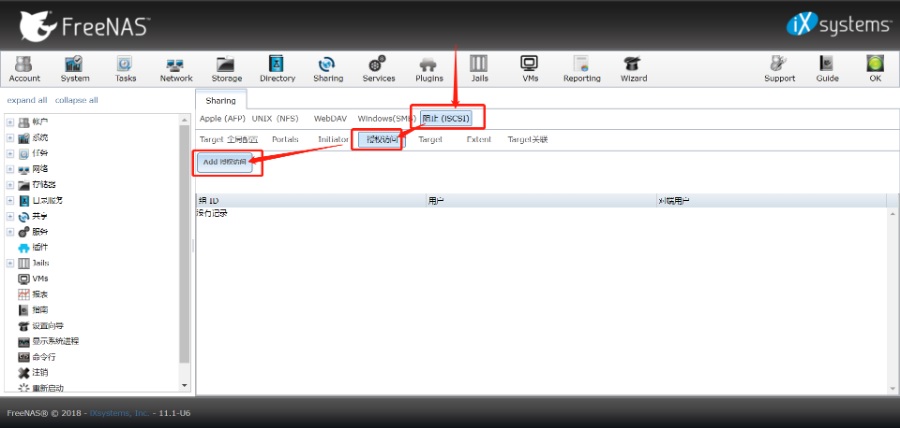
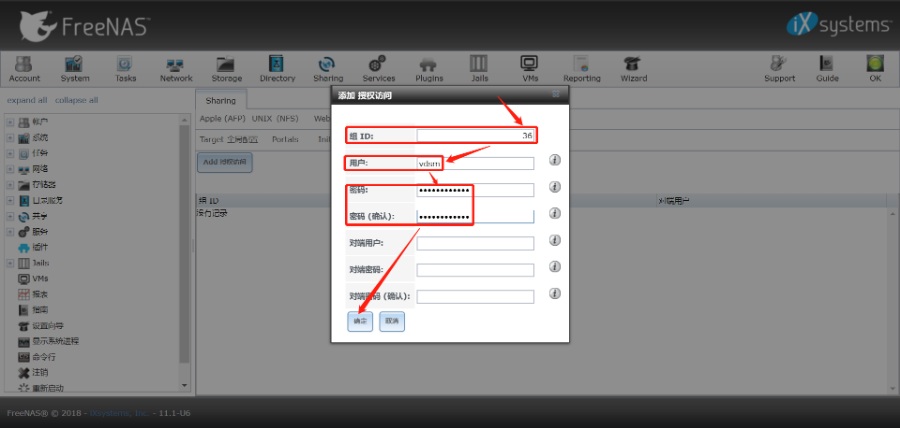
7、创建用户组kvm和用户vdsm,ID均为36(ovirt访问存储需要用到)
8、添加iscsi访问授权,添加组ID36 vdsm用户,设个密码,此用户密码会在部署hosted-engine发现iscsi存储时使用
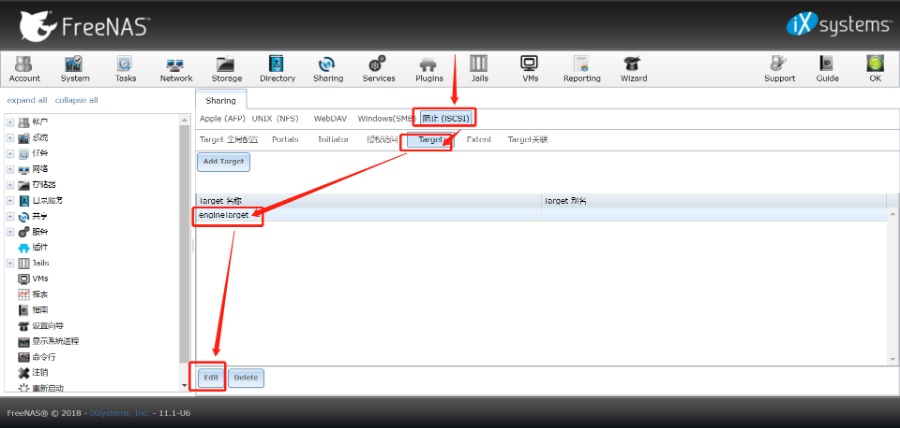
9、修改target的认证组编号为36(不使用认证的,话步骤可不配置)

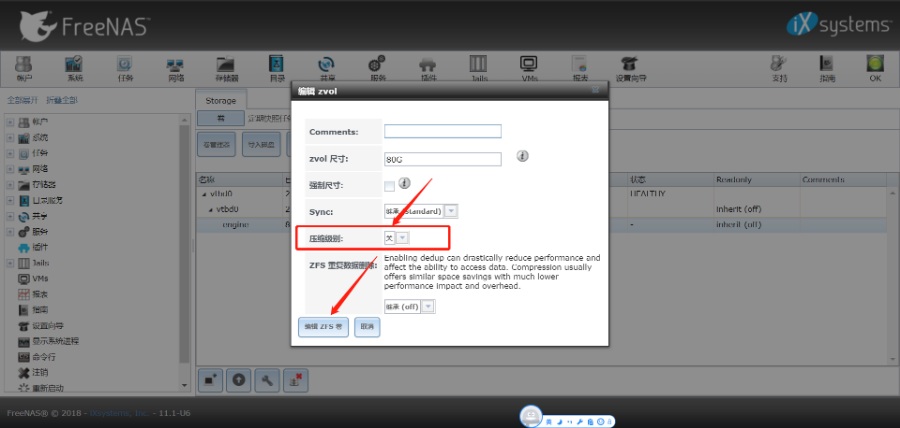
10、修改存储卷的压缩级别为“无”,以提高性能,在Storage中选中刚才创建的卷,编辑
至此,一个iscsi共享存储就建好可以用了,在ovirt hosted-engine部署时选择iscsi,输入这台freenas服务器的地址进行发现lun就可以了。
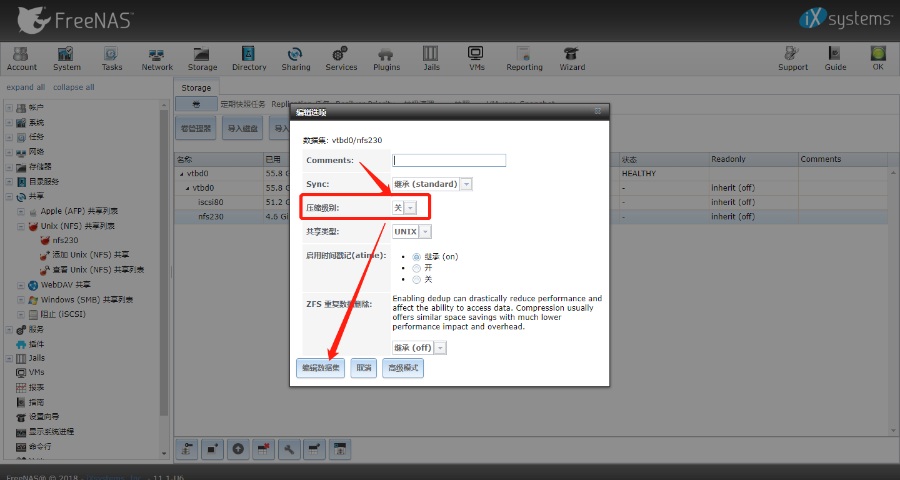
配置nfs共享
nfs共享的配置步骤与上述iscsi类似,同样可以使用向导(Wizard)进行配置,在配置共享时,选择NFS
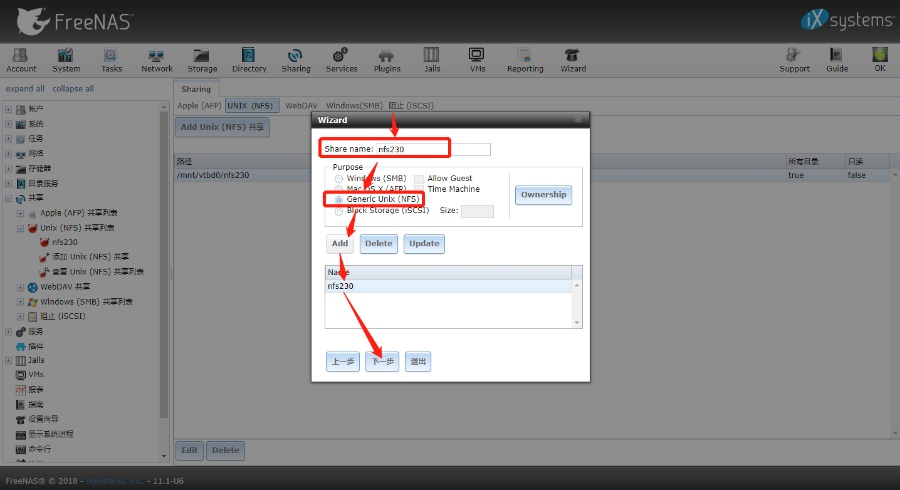
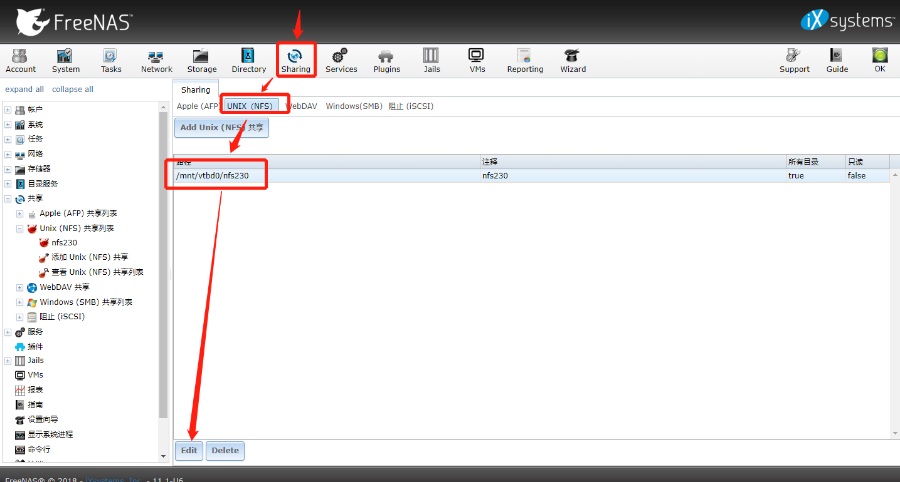
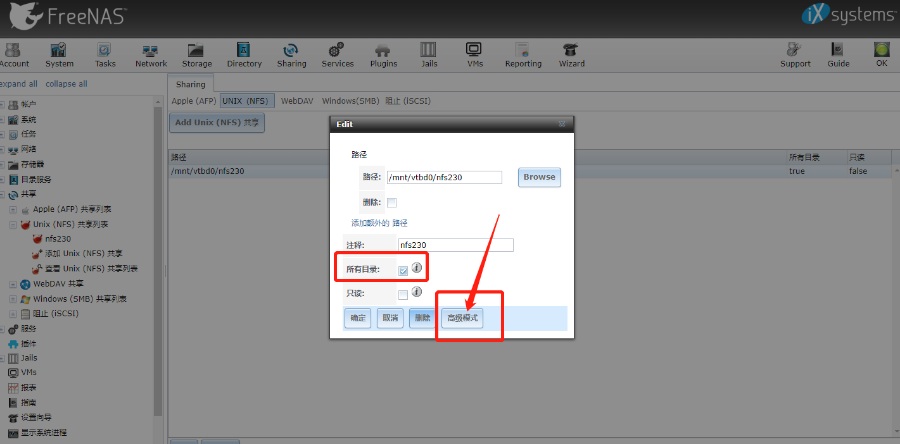
建好之后,编辑共享,在高级模式下为NFS共享加访问用户权限

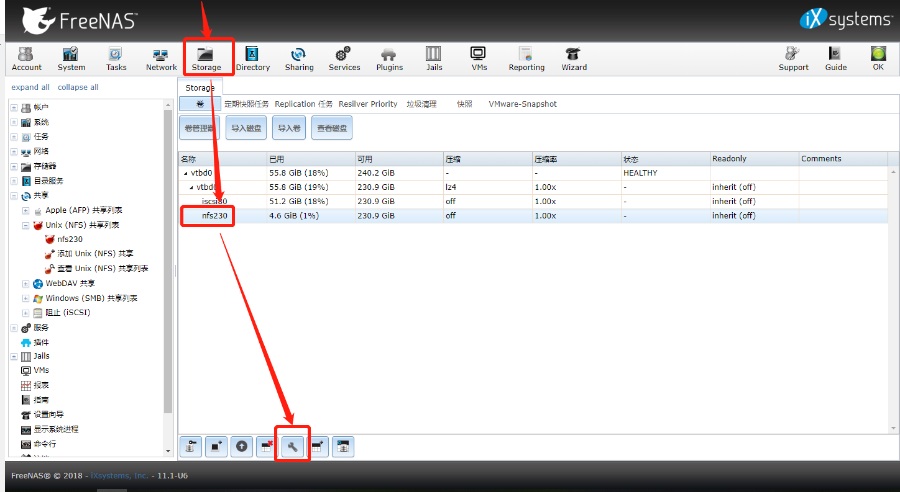
编辑存储,将压缩级别关掉


上篇:
Gluster部署失败后的清理操作, Hosted Engine部署失败后的清理操作
下篇:
oVirt4.3.8部署教程(单台主机All in one)
1 智能目标检测:用 Rust + dora-rs + yolo 构建“机器之眼” 2 vLLM + FastAPI:一个高并发、低延迟的Qwen-7B量化服务搭建实录... 3 网络故障秒排指南:10 个实战命令从入门到精通 4 Echo:还在用“旁路由”?All in One主机才是未来:PVE+OpenW... 5 男人若想发大财,就莫要去打工,我推荐做这二十件事。 6 使用MCP+Neo4j零代码构建自己的知识图谱 7 运维必备:掌握这3个存储技术 8 2025年性价比最高的AI服务器拆解:768GB显存暴打训练慢的痛点 9 win11 连接共享打印机报错:0x00000040 或者 .709或者 .11... 10 7大热门Agent框架盘点:助你轻松构建多智能体AI应用 11 IT运维服务方案V3.0【拿来即用】 12 Thumoon:Python图像处理的高效利器,快速上手指南